how to design a trifold brochure


How to

Tri-folds are not difficult to design, once you know how to. Make it easy on yourself and download our free starter mockup file. All you need is a copy of Adobe Photoshop and if desired Adobe Illustrator. Follow along with our video to learn some useful design tips.
The included files can be opened with Adobe Photoshop and Adobe Illustrator
Download the ZIP file

Watch the movie

As a rule, follow this global approach when designing (your checklist):

  • Compose all the text you need in your design.
  • Assemble all the corporate elements. This includes logo mascot and if applicable color schemes. Logos should be available in Adobe Illustrator or high resolution PNG files. In the case of color schemes make sure you have CMYK values ready. We offer a free RGB to CMYK color chart and more information here.
  • Gather all the images, icons, graphics and photos.
  • Start with a general look. Ideally find a suitable mockup starter design.
  • Now starts the fun part. Think proportions. Compartmentalize your creations to make a visual pleasing design. Show your work to your peers or people with good taste you can trust. A word of caution; too many cooks can spoil the broth.
  • Select the right paper quality for your application, for example, 100lb Gloss Cover with AQ (Aqueous Coating). The paper does not feel flimsy and the aqueous coating allows for a silky smooth finish. If you are going for the glossy look, give 100lb Gloss Book with UV a try. The thickness of the paper is slightly thinner than 100lb Gloss Cover, however the gloss UV cover makes color pop wonderfully.
  • Submit your design for print. Make sure your final work is in CMYK mode (more below) and the appropriate resolution for final press printing. If you use our trifold brochure mockup file you wont have to worry about this.
  • Finally use our online printing services to make your print project a reality.

File preparation


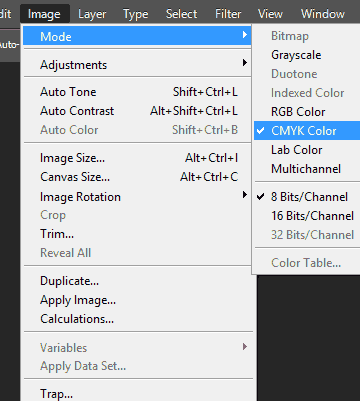
We suggest you switch back and forth between CMYK and RGB mode (Photoshop >Image >Mode >CMYK). Why switch? In CMYK mode you loose some of the nice editing feature such as Vibrance, HDR Toning and Exposure. But, make sure your final work is saved in CMYK mode. This assures colors will not shift drastically. You can find more information about this topic in our RGB to CMYK tutorial.

File output


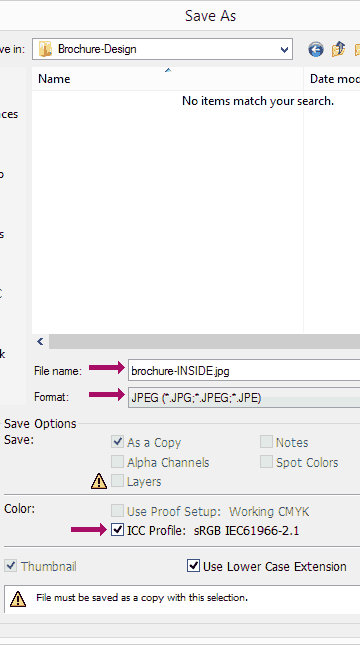
You are ready to save your work for final output. Go to File >Save As... and give your work a descriptive name, including the INSIDE or OUTSIDE directive. This is a very important step as it gives us instructions of which part of your print design belongs to the outside or inside.

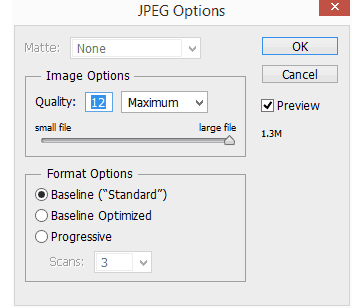
JPG Compression (always use best quality)


Make sure to save your work at the best possible quality.